

How to use Web3Auth with Pimlico
Web3Auth is a popular embedded wallet provider that supports a range of login methods. Web3Auth also has strong native account abstraction support allowing you to offer smooth UX for your users through features like social logins, sponsored transactions, and transaction batching.
Setup
To enable Account Abstraction in your Web3Auth project, head to your Web3Auth dashboard and enable the Smart Accounts feature on the sidebar. Once enabled, add the Pimlico bundler and paymaster endpoints (these can be found here)
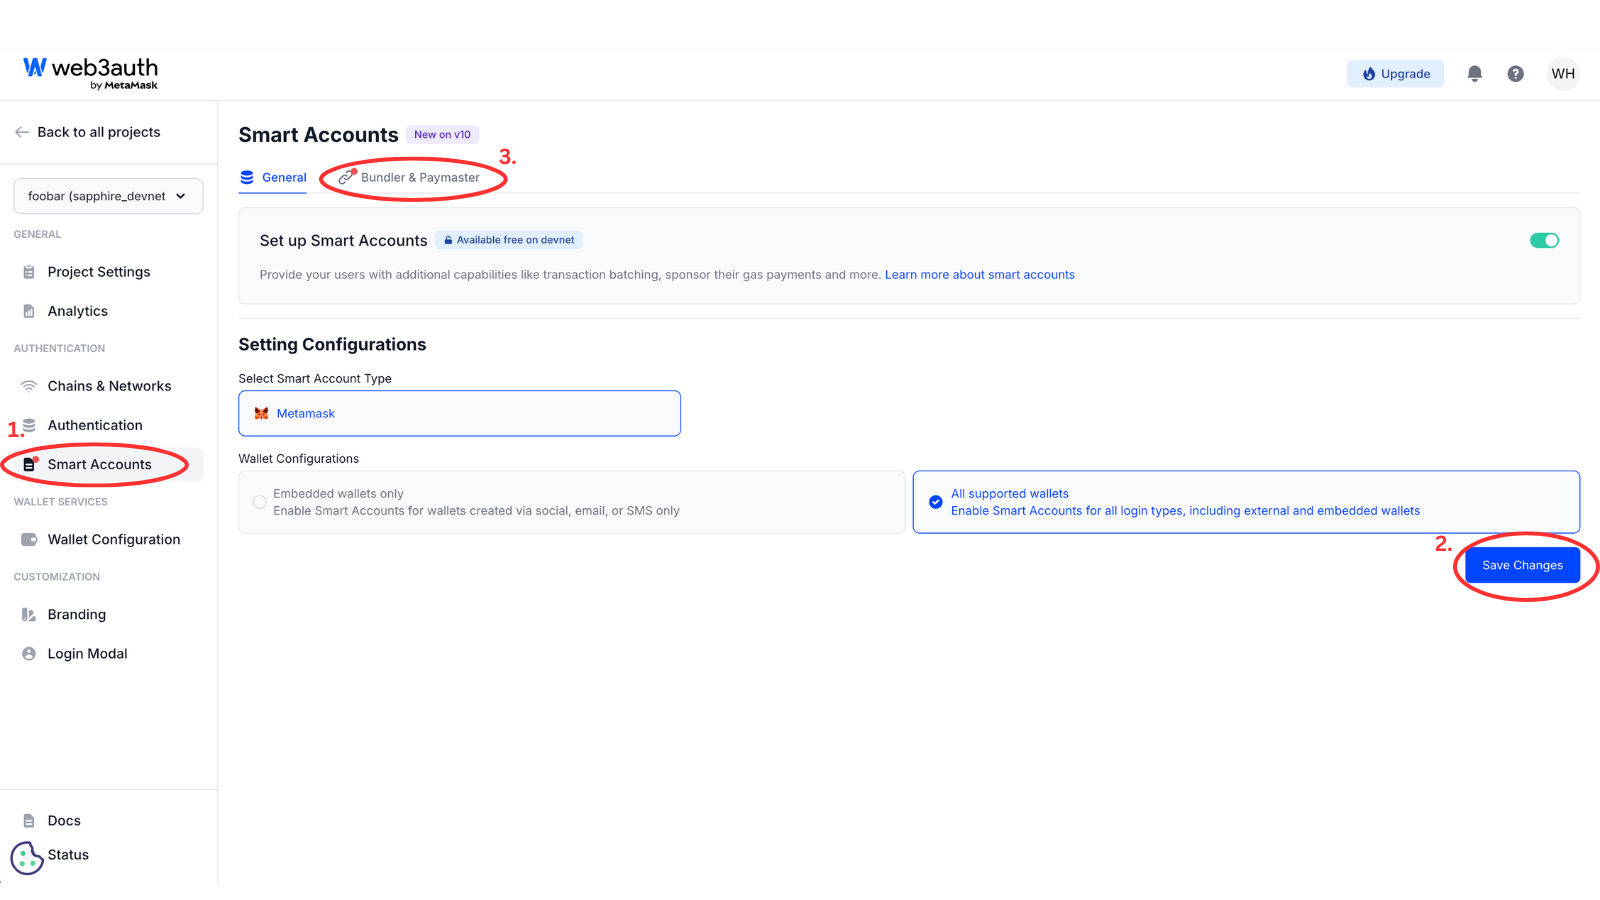
A more details walkthrough on how to setup the dashboard can be found here on the Web3Auth docs
Integration
After setting up your Web3Auth project on the dashboard, make the following changes to your client side application.
Create the Web3Auth provider
After following the Web3Auth documentation, you will have access to a web3auth object as shown below that you can pass as an owner to createeSmartAccountClient:
import { WEB3AUTH_NETWORK, type Web3AuthOptions } from "@web3auth/modal"
import { QueryClient, QueryClientProvider } from "@tanstack/react-query"
import { WagmiProvider } from "@web3auth/modal/react/wagmi"
import { type ReactNode } from "react"
import { Web3AuthProvider } from "@web3auth/modal/react"
if (!process.env.NEXT_PUBLIC_WEB3AUTH_CLIENT_ID) {
// get from https://dashboard.web3auth.io
throw new Error("missing NEXT_PUBLIC_WEB3AUTH_CLIENT_ID env var")
}
const web3AuthOptions: Web3AuthOptions = {
clientId: process.env.NEXT_PUBLIC_WEB3AUTH_CLIENT_ID,
web3AuthNetwork: WEB3AUTH_NETWORK.SAPPHIRE_DEVNET
}
const web3authConfig = {
web3AuthOptions
}
const queryClient = new QueryClient()
export function AppProvider({ children }: { children: ReactNode }) {
return (
<Web3AuthProvider config={web3authConfig}>
<QueryClientProvider client={queryClient}>
<WagmiProvider>{children}</WagmiProvider>
</QueryClientProvider>
</Web3AuthProvider>
)
}Wrap your main app logic using the provider
Wrap your app's entryPoint such that it uses the provider we previously created
"use client"
import { Home } from "@/components/home"
import { AppProvider } from "@/components/provider"
export default function Main() {
return (
<AppProvider>
<Home />
</AppProvider>
)
}Connect using Web3Auth's connect component
Use the Web3Auth hooks to handle authentication. This component will display a login button when disconnected and show the smart contract wallet address when connected:
import { useAccount } from "wagmi"
import {
useWeb3AuthConnect,
useWeb3AuthDisconnect
} from "@web3auth/modal/react"
export function Web3AuthConnect() {
const { connect, isConnected, connectorName } = useWeb3AuthConnect()
const { disconnect } = useWeb3AuthDisconnect()
const { address } = useAccount()
if (isConnected && address) {
return (
<div className="flex flex-col items-center gap-4">
<h2>Connected to {connectorName}</h2>
<p>Smart Contract Wallet: {address}</p>
<button onClick={() => disconnect()}>
Sign out
</button>
</div>
)
}
return (
<button onClick={() => connect()}>
Sign in with Web3Auth
</button>
)
}Send a userOperation
Once connected, you can send userOperations using the wagmi hooks. The smart account configuration from your Web3Auth dashboard will handle bundling (and gas sponsorship if a paymaster is set):
import { useSendTransaction, useWaitForTransactionReceipt } from "wagmi"
import { zeroAddress } from "viem"
export function SendUserOperation() {
const {
data: hash,
error,
isPending,
sendTransaction
} = useSendTransaction()
const { isLoading: isConfirming, isSuccess: isConfirmed } =
useWaitForTransactionReceipt({ hash })
const handleSendTransaction = () => {
sendTransaction({
to: zeroAddress,
data: "0x",
value: BigInt(0)
})
}
return (
<div className="flex flex-col items-center space-y-4">
<button
onClick={handleSendTransaction}
disabled={isPending}
>
{isPending ? "Sending..." : "Send userOp"}
</button>
{hash && (
<div className="text-center">
<p className="text-sm">Transaction Hash:</p>
<p className="text-xs">{hash}</p>
</div>
)}
{isConfirming && <p>Waiting for confirmation...</p>}
{isConfirmed && <p>Transaction confirmed</p>}
{error && <p>Error: {error.message}</p>}
</div>
)
}For a full example, see the example permissionless + Web3Auth app.